Friday, December 01, 2006

Day 17 - Rub Rails (cont.)


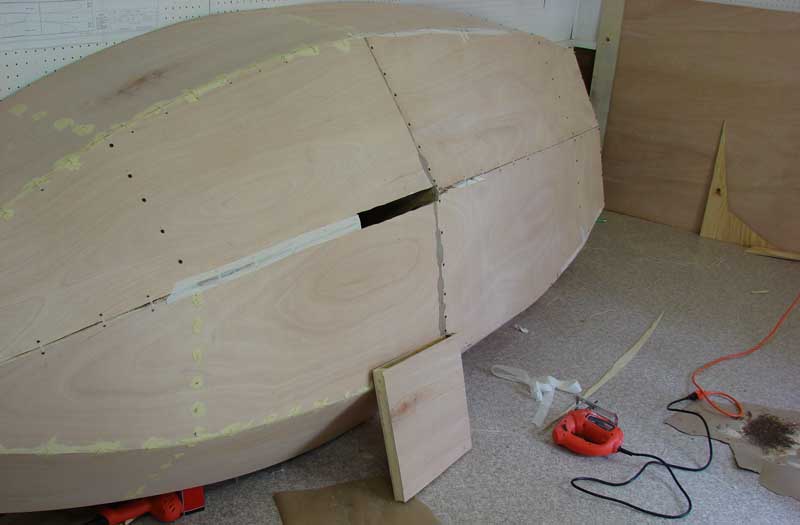
Last night I spent a couple hours finishing up the main rub rails and tracing out the pattern for the middle seat. Earlier, I decided to make my rub rails out of whatever was conveniently available, and in this case it was 8 ft long 1" x 2" strips which I cut down the middle. Because a "1x2" from the store isn't exactly 1" by 2", the new rails ended up being about 3/4" on each side.

I fastened the rub rails to the outside of the 1/4" body with screws. The screws were slightly too long so the tips poked out the other side... I accidentally cut myself last week on one of these little sharp screw tips. So I ground off the tips with a grinder bit and my electric drill.

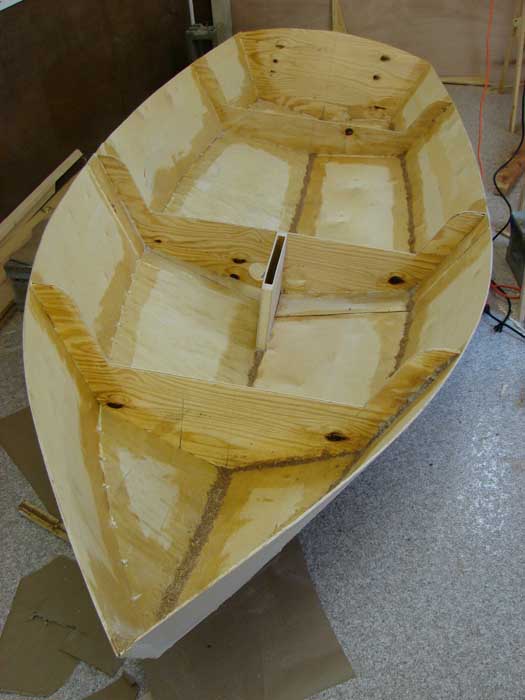
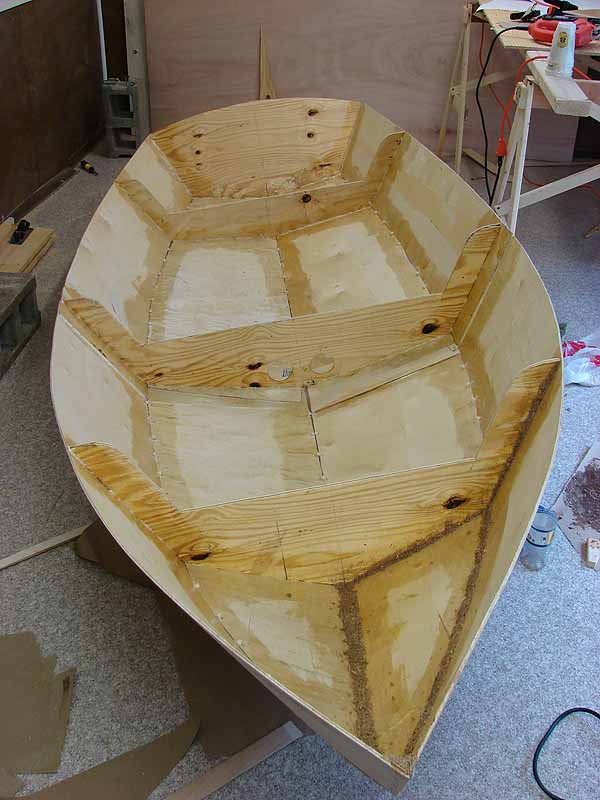
I also connected two "knees" in the rear of the boat. These "knees" provide some stability and strength to the corners and seams as well as adding a nice aesthetic touch.

~E

Friday, November 17, 2006

Day 16 - Rub Rails & Such

The other night I worked on the boat for a couple hours (I'll post photos soon). I added 8 foot strips of wood on the top outside edges of the boat for rub rails and to give the 1/4" plywood some strength & stability. I also added a front "breast hook" and some "knees" in the back corners. These also add strength & stability, plus they make the boat look nicer to boot! :)

~E

Sunday, November 05, 2006

Day 15 - And The Glassing Continues...

Today was Sunday and so I was able to work for a couple hours on the boat. I had to swing by Lowes to pick up some more epoxy and fiberglass cloth. I was able to finish all of the outside seams except for the ones around the back vertical panel (transom). I also brushed on a good thick coat of epoxy on the rest of the bottom panels. This will help strengthen the wood and keep it watertight. Between my sailboat project and our other house projects* I've been keeping quite busy lately.

*The wife mowed the lawn while I worked on my boat, and then later we worked on weather stripping all the doors and windows of the house, and also continued working on the 'guest bathroom renovation project'. The in-laws are coming next week.

:)

Friday, November 03, 2006

Day 14 - Fiberglassing, Cont.

I worked for another hour this evening and put on 6 more strips of fiberglass until I ran out of epoxy. Will continue the glassing after I get some more fiberglass cloth and epoxy (probably on Sunday).

~E

Wednesday, November 01, 2006

Day 13 - Fiberglassing Outside of Hull

Tonight I started glassing the outside seams of the boat. But first I did some last-minute sanding with the electric sander. I didn't get a whole lot accomplished, but what I did finish looks pretty good.

I usually get home about 45 minutes before Janell, so I try to get as much done before she arrives and fixes supper. So I don't usually work for very extended periods of time (in the evenings). But it actually works out well, because I can't really work very long in those fumes anyway. :)

~E

Friday, October 27, 2006

Day 12 - More Fiberglass

I worked another hour or 2 fiberglassing the inside of the boat last night. I have finished putting glass & epoxy on all of the major seams and will probably start doing the outside next. Then I'll finish patching up the remaining spots on the inside of the hull.

With the weather getting colder outside, I've been keeping the doors to my workshop closed which drastically cuts down on good fresh-air ventilation... And with all the epoxy and acetone fumes in there, it can get pretty strong! One evening when I was working out there I started getting light-headed, so I figured it was time to quit for the night.

Last night I rigged up a paper curtain in the doorway which helps to hold in the warm air (3 or 4 feet from the ceiling) and then allows fresh air to come in down below. That seemed to work pretty well, however it wasn't very cold out yesterday... Hopefully I'll get this fiberglassing all finished before it gets too cold.


~E

Thursday, October 26, 2006

Day 11 - Fiberglass

I started applying strips of fiberglass cloth to the inside seams of the boat. I mixed just enough epoxy for one strip at a time, and accidently got the mixture wrong for one batch (didn't add enough reactor to the epoxy resin). But I checked it 24 hours later and it seemed to be hardening... I will also add fiberglass to the outside of the boat so I don't think it should be a problem.


~E

Monday, October 23, 2006

Day 10 - Daggerboard Trunk

This is the day that I got to cut a hole in the bottom of my boat. This hole is for the daggerboard trunk to go into. After cutting out the 1.5" wide hole, I glued and screwed the daggerboard into place against the center seat support.

Then I whipped up a couple batches of sawdust puddy and finished off filling the remaining interior seams. While I was mixing up the second batch of epoxy, I accidentally flicked some resin & acetone onto my eye. I managed to close my eyes fast enough, but when I tried wiping it off my eyelid some managed to get into my eye. Luckily Janell was in the yard watering some plants so I ran up and quickly rinsed out my eye for a few minutes.

NOTE: Do NOT put acetone in your eyes!!!

I also added an extra support to the rear piece ("transom") since it had a slight bow to it, plus the plans recommended adding this support... I screwed it to a 2x4 to help keep it straight. Then I added the puddy around the transom. After the puddy had been applied, I attached a couple "one-by" strips to the top edge of the daggerboard trunk. This will add stability and also give me something to fasten the seat-top to.

Once I had finished all of the above, I decided to add wood filler to the outside of the boat seams to smooth it out before I add the fiberglass. I am getting really close to the fiberglassing process!


~E

Wednesday, October 18, 2006

Day 9 - More Epoxy Puddy

I worked a bit more on filling the seams with homemade epoxy & sawdust puddy. It took a while to mix up, but I was able to do two long seams in two batches of puddy. I also glued the other half of the daggerboard trunk together with Gorilla Glue. Hopefully it is all water proof on the inside of the trunk now.

That's it. Nothing much new today. :)


~E

Monday, October 16, 2006

Day 8 - Epoxy & Puddy

Yesterday I was able to work on the boat some more. This wasn't exactly my first experience with epoxy, however it was my first experience with this much epoxy! I started by mixing up 8 oz. of resin with the reactor (14 drops per 1 oz. of resin). This turned out to be slightly more than I could apply before it started hardening so I cut the next batch down to 4 oz. I used a cheep $.69 brush that I found a Lowes to apply the epoxy to the panels.

I saturated a 5 or 6 inch swath of wood (with the epoxy) along the boat seams. This will make this area very sturdy and water-tight, and will give the fiberglass something to stick to. I completed all of the interior seams and then decided to start filling in the cracks with puddy. The plans recommended making an epoxy based puddy with the resin and sawdust. So I mixed up a batch (this time using a full 8 oz. of resin). Once I had a good doughy consistancy I started pressing it into the seams, trying to cover the zip-tie locks which are on the inside of the boat.

I also decided to start filling in the holes on the outside of the boat with store bought wood puddy. This will make the final fiberglass seam smoother...

Since the fumes were starting to get to me and I was waiting for a phone call, I decided to stop for the evening. I checked back a couple hours later and my homemade epoxy puddy was rock hard and fairly rough. I'm not sure how smoothly the fiberglass will go over this puddy. I should probably try to 'glass' over puddy that is still somewhat plyable... Maybe I can sand down the hardened seams before I glass them? I guess we'll find out in our next post! :)


~E

Saturday, October 14, 2006

Day 7 - Stitching the Bottom Panels

Friday I was feeling pretty lousy (cold symptoms) so I left work early and came home to relax - ate lunch and watched TV for a few hours. Then I went out and started stithing the boat seams together with plastic zip-ties. It took me several hours to drill the holes and thread and synch down all the zip-ties. But it definitely looks like a boat now!


I also started assembling the daggerboard trunk for the removable wooden keel. I needed some 1" thick pieces of wood for the spacers, so ended up cutting the needed pieces out of a 2x4 scrap. Then I applied some Gorilla Glue and clamped it down with some $1 each clamps I purchased at Ace Hardware.

The next step is to start fiber glassing the seams, but I'll explain that process in the next post.


~E

Day 6 - Attaching Bottom Panels

Thursday evening I came home and attached the bottom panels to the boat. My sister and her kids were coming to visit later that evening so I worked as fast as I could... In hindsight I should have gone a little slower, but oh well... The panels didn't go on straight which required me to make a few corrective cuts to the already correctly cut panels!!! DOH!!! :(

It's going to be ok, it's just not going to be perfectly symetrical, but I doubt too many people will notice.


~E

Tuesday, October 10, 2006

Day 5 - Starting to Take Shape

Today I cut out the various seat supports from the 3/8" plywood. I drilled holes in the bow seam of the side pieces and loosly stitched them together with plastic zip-ties. Then I started the process of attaching the seat supports (which also give the boat it's distinctive curves). The 1/4" plywood sides bent very easily over the supports. I found that using Gorilla Glue and wood screws seemed to work the best (small nails kept pulling out).

Woohoo! It looks like a boat!

This part took me about 3 hours


~E

Day 4 - Butt Block Slippage

Yesterday I went out to see how the Gorilla Glue worked and found that one of the "butt blocks" had slid off it's original mark. My little workshop isn't exactly level, and evidently the glue created a nice hydrolic cushion for the butt block to glide on... Gravity did the rest. Having not used Gorilla Glue before I think I might have accidently used too much... This is what it looks like now:

The one on the left is correct. The one on right has slipped... The good news is that the Gorilla glue is SUPER STRONG, so I don't think it will be a problem. However once the pannel has been installed in the boat I might reinforce it if I think it needs it.

I started tracing out some of the other parts on the 3/8" plywood but didn't get around to cutting any. Maybe tomorrow.


~E

Sunday, October 08, 2006

Day 3 - Cutting Out Panels

Today I was able to finally cut out the first plywood panels for my V12 sailboat. The name "V12" refers to the V-shaped hull (not like a flat-bottom boat) and the "12" refers to the boat's length (12 feet long). A flat-bottom boat is much easier to build but a V-shaped hull provides better stability in the water.

Because these panels are at least 12 feet long and the sheets of plywood are only 8 feet long, I had to devide the boat panels over two pieces of 1/4" plywood (see the first photo below).
After I cut these pieces out I glued the two pieces together with with a "butt block" and Gorilla Glue, which is a 100% waterproof polyurethane glue claiming to be "the strongest glue on planet earth". The butt blocks are 8" wide strips of plywood that are glued to the inside of the boat panels. I weighted down the butt blocks with concrete cinder blocks and let them cure overnight.

Click thumbnails to view large images

Before I started cutting out the plywood panels, I had to build two simple saw horses which I threw together with some scraps of wood in about 1 hour. They aren't super sturdy or strong, but they are good enough for what I needed. :)


~E

Wednesday, October 04, 2006

Day 2 - Cutting Paper Patterns

Last night I started tracing and cutting out the paper patterns for the large boat pieces. The plans say that this process should take only 2 hours. I spent 1.5 hours last night and I'm not even close to being done with this step of the process! I think that I might be doing it the long way...

I bought a large roll of paper, which I am tracing the pattures onto. Then from that, I will trace those patterns onto the plywood and then cut them out. It's a longer process, but I think it will be easier and more accurate in the long run.

Yesterday I swung by Lowes and Home Depot and realized that fiberglass wasn't all that expensive nor did it seem all that heavy, so I think I probably will reinforce the boat seams with fiberglass afterall.


~E

Monday, October 02, 2006

Day 1 - The Boat Plans Arrive

The boat plans arrived today!!! Whoohoo!!! I'm so excited. It's feeling more and more like this is actually going to happen. The boat I've decided to build is the V12 Dinghy from boatplans-online.com. The plans took over a week to get here, (from Florida to Tennessee) so I wasn't very impressed with that. But the extra time waiting gave me the opportunity to clean up and start organizing my workshop.

The V12 boat plans cost me $40 U.S. (plus shipping) but I think it was well worth it. My original (cheap) plan was to just look at all the V12 photos and basic plans that I could find online and just figure it out as I went along, estimating shapes and sizes. I'm the type of person who doesn't always like to follow directions - Just give me the basic idea and I'll figure the rest out. But the more I thought about it, the more difficult building a boat seemed! ...at least building a boat that I wouldn't be embarrassed to take out on the lake... So I caved in and bought the plans, and I am now very happy that I did!

The package from boatplans-online included:
  • Building Instructions (5 pages)
  • A "Help, Tutorials and Tips" sheet
  • A different "Help" sheet
  • Instructions on how to build The Sprit Rig (3 pages)
  • Basic diagram of parts (two 17x11" sheets)
  • and 34 x 22" paper pattern sheets (5 large sheets)
The plans call for 2 sheets of 3/8" plywood and 4 sheets of 1/4" plywood for the main body parts of the boat (which I have already bought). I will also use lots of screws, waterproof glue, and plastic zip-ties. The plans also recommend that I use epoxy & fiberglass to seal and reinforce the seams of the boat... I'm not 100% sure yet whether or not I'll do this part though, if it ends up making it too heavy or too expensive... We'll see once we get to that part of the process. :)

My goal for this project is to build a relatively cheap boat which is also light enough for me to carry on the roof of my car to the nearby Chickamauga Lake (part of the Tennessee River near Chattanooga, TN). I also want to be able to carry up to 3 or 4 people in it - Sailing is fun, but it's even more fun with friends! So the V12 seemed to be the right boat for me!

The next step is to start tracing the patterns onto the plywood and cutting out the pieces. The plans estimate that it should take the average person 24 man hours to complete this project. I'll be keeping track of my time and expenses as I go...


~E